I made this Friendship Bracelet Board Loom to make it easier to follow friendship bracelet patterns. Confession: This California girl who was a child in the sixties can’t do the ‘hippie thing’ and just safety pin the threads to my jeans and keep track of where all those threads and knots are supposed to be going. Sigh.
I’ve made several bracelets with a cardboard loom. The great thing about this loom is that it cost me nothing. Zero. Zip. The bad thing is that I noticed it was fraying the bracelet threads just a bit, but enough so that I needed to find something that would hold the threads without making them fuzzy.
I solved my problem with fifty-nine cent sheet of craft foam and a hot glue gun. Later I went all deluxe and added a plastic quilting template sheet and a mini clipboard. The friendship bracelet board is great to take along when traveling, it’s totally portable; stuff it in your craft bag and go. 🙂 Instructions for making your own Friendship Bracelet Board Loom are below. (The free and easy bare cardboard version is first and then the Deluxe version is below that.) Have fun! – Laura
DIY Friendship Bracelet Board Loom Instructions
Free and Easy Friendship Bracelet Board Loom:
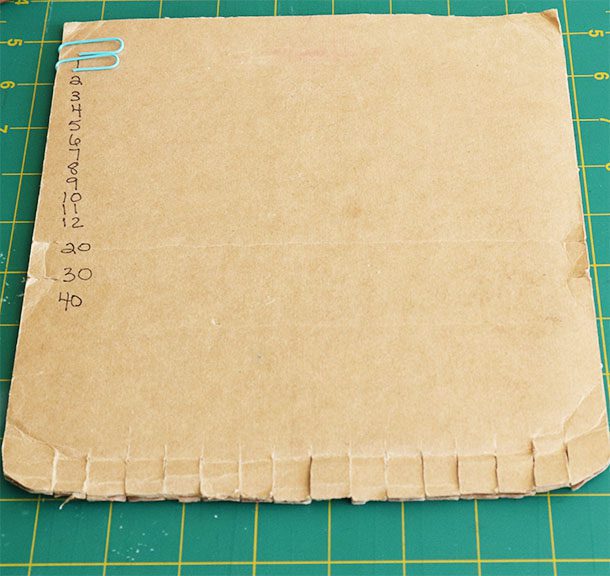
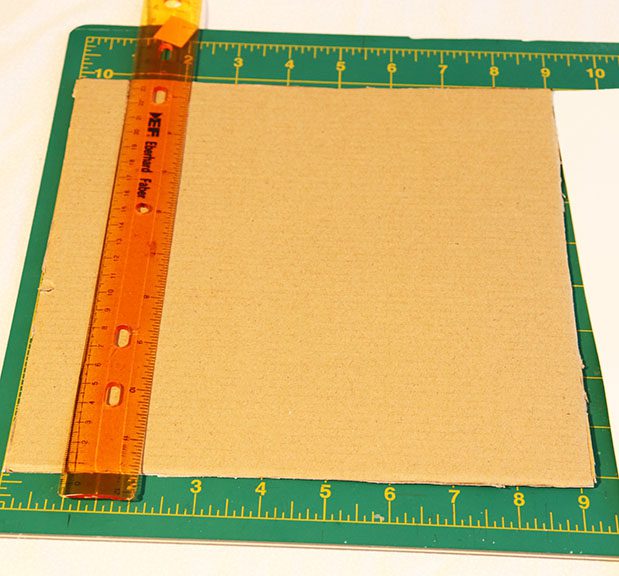
I use mid-weight corrugated cardboard or chipboard. (From a large shoe box.) Any heavier weight cardboard is hard to cut through and will definitely fray your weaving threads.
- The cardboard loom pictured is 9″ x 10″. It can be whatever size you desire, though. Eyeball it.
- Cut slits, no more than 1 inch deep about every half inch to hold threads.
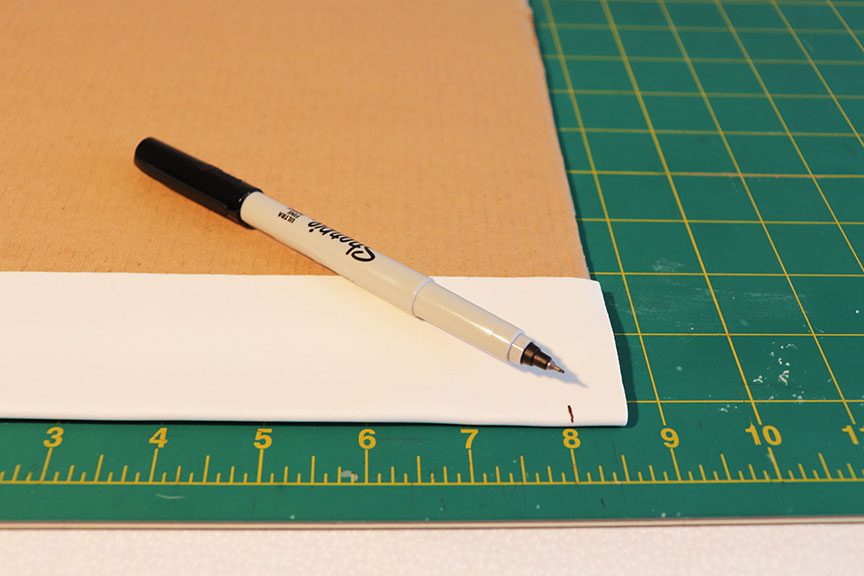
- Use a permanent ink pen (like a Sharpie) to write the numbers for rows on the left side. (see picture.)
- Add a medium to large binder clip at the top or if you don’t have one handy, cut a 1/2″-1″ slit in the center top to anchor your knot or button hole. (not pictured)
- Add two paper clips to the left side to slide along the row numbers. Your board is ready to use.
Deluxe Friendship Bracelet Board Loom Instructions:
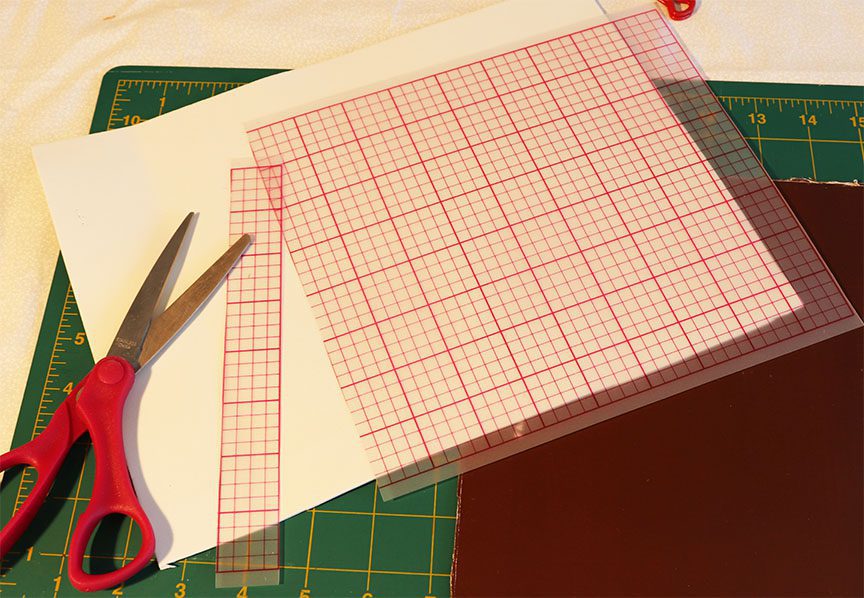
Items you will need
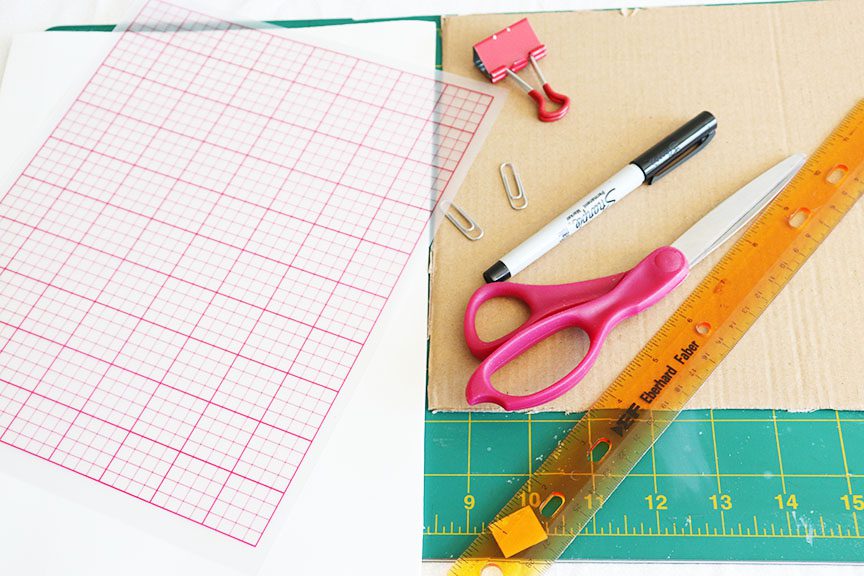
- 9″ x 9″ mid-weight corrugated cardboard or chipboard
- 9″ x 12″ piece of white craft foam
- mini hot glue gun and glue sticks (not pictured) (Warning: Hot glue can get very hot. Care in handling and/or adult supervision is necessary.) -OR- I recommend (because I’ve used and liked it) Aleene’s Quick Dry Tacky Glue.
- scissors
- ruler
- 2-3 paper clips
- 1 medium or large (binder clip)
- permanent ink pen
- 1 plastic 8.5″ x 11″ quilting template sheet (optional)
- 1 small low profile clipboard size 6″ x 9″ (optional) (not pictured)
Directions:
- Turn cardboard square to the wrong side and draw 1″ line from one end. (This will be the bottom of the board.)
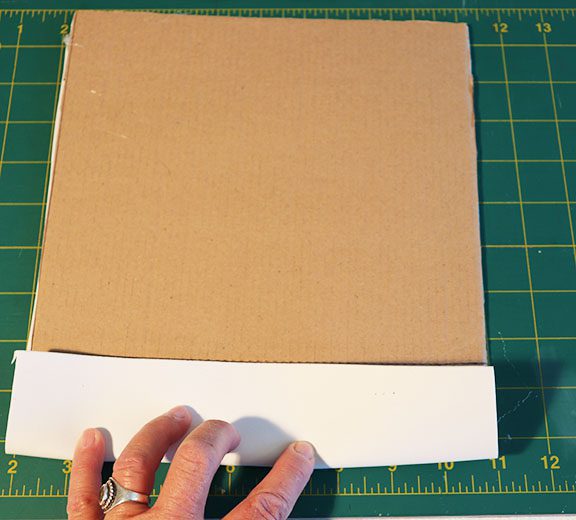
- On the front side of the cardboard at the top, add a bead of glue from corner to corner and glue matching the top two corners of the craft foam with the cardboard.
- Continue gluing the craft foam and cardboard together on the remaining three sides. Smooth the glued edges as you work.
- Flip the cardboard and foam so the wrong side is face up. Gently fold the craft foam to the back to meet the line you made earlier. (The foam will double over itself at the bottom by about 1 inch. The double craft foam is where you will make the slits to hold the threads.)
- Working quickly; make three beads of glue from side to side: One along the 1 inch line, and two close together along the inch of craft foam next to the cardboard. Glue the edge of the craft foam to the one inch line and press the doubled craft foam together and smooth it.
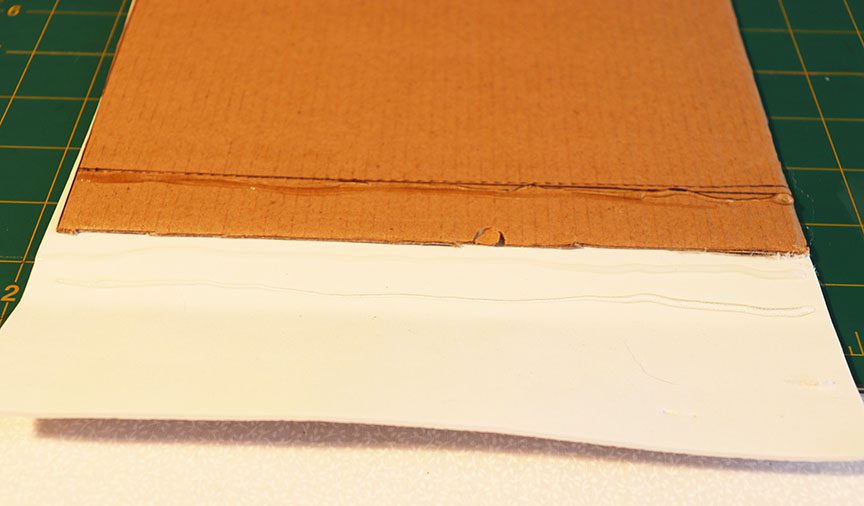
- On the right side of the board: You may wish to carefully trim any ragged cardboard peaking out from behind the craft foam. (Not super important, but it will look nicer. 🙂 )
Please note: Choose either option A or B then go to ‘continuing directions’ below.
- Option A: Use this option If you are using the quilting template sheet.
- Trim all the edges from the template and cut off the bottom row of squares so that it will be 9 inches long and 8 inches across.
- Center the quilting template, (there will be about 1/2″ of board on each side of template.) and hot glue it, matching evenly with the top of the craft foam. Anchor the template at the sides with a dot of hot glue half way down on each side. Hot glue the template with a thin line of glue across the bottom above the doubled craft foam. Work quickly to smooth down the bead of glue.
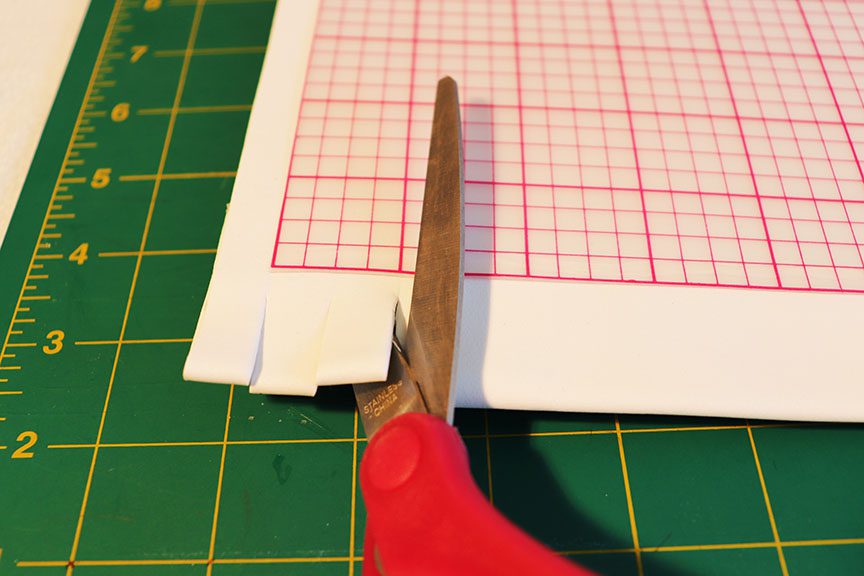
- Cut slits every half inch using the markings on the quilting template as a guide. Cut into doubled craft foam only. Do not cut into cardboard or template. (see picture)
Option B: Use this section only if you are not using the optional template sheet.
- Measure and make dots every half inch along the wrong side of the doubled craft foam and then cut slits only through the doubled foam. (Do not cut into the base of the cardboard.)
Continuing Directions:
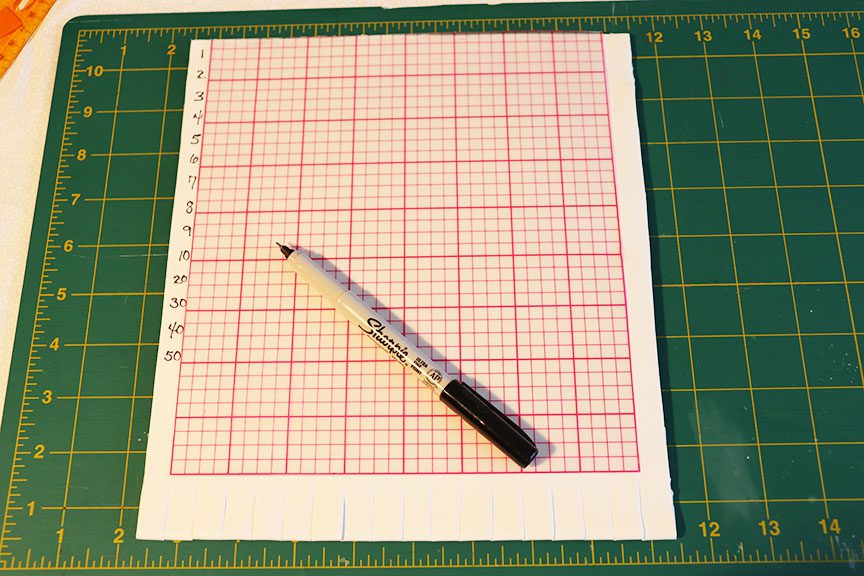
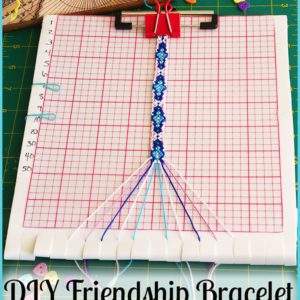
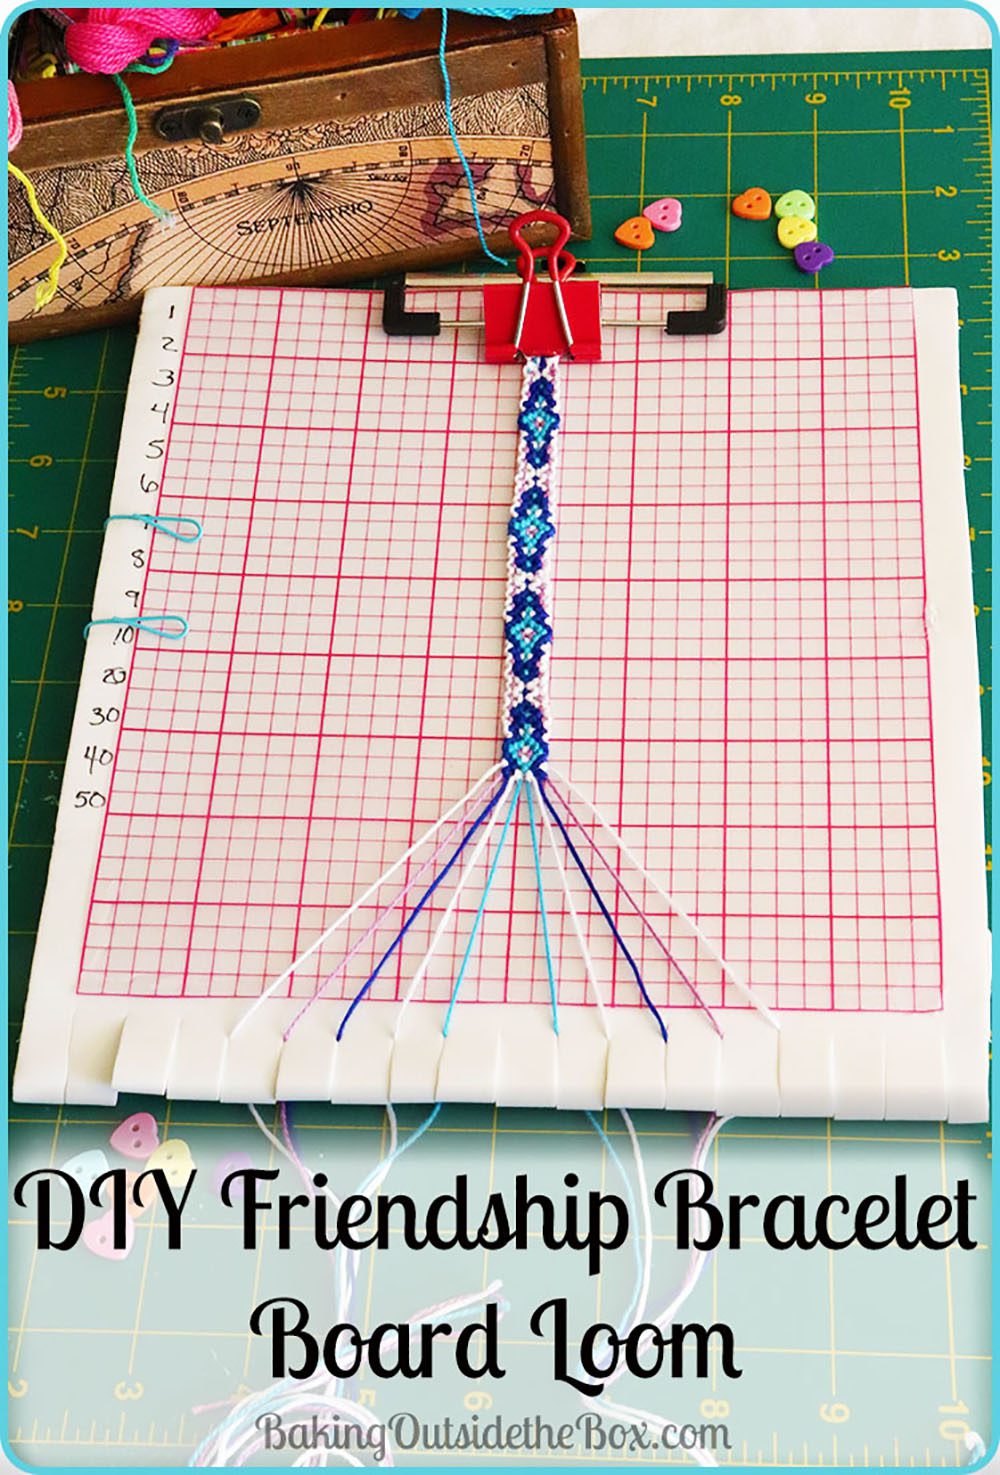
- On the front side of the Friendship Bracelet Board Loom draw the numbers 1-10 and then 20, 30, 40 and 50, or more, as pictured along the left hand side. These numbers help you keep track of which row you are on in the pattern.
- For instance, after row 10, slide the first paperclip up to 1 and leave the second on 10 to indicate row eleven. This is a great help if you are interrupted while weaving. It makes it easy to see exactly where you are in the pattern.
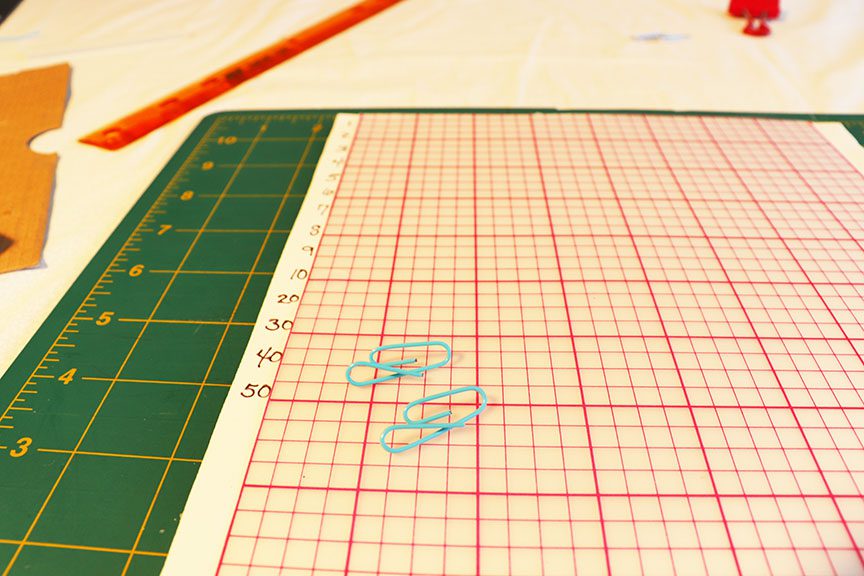
- Bend the paper clips and add to the left side of the board to keep track of the pattern row. (If you open them up slightly and bend back the large end of the pin up as pictured, it won’t bite into or mar the craft foam. (The third clip is optional and is to keep threads out of the way when not in use, if desired.)
- Add a medium or large paper clamp to the top of loom to hold the button hole or knot in place at the top.
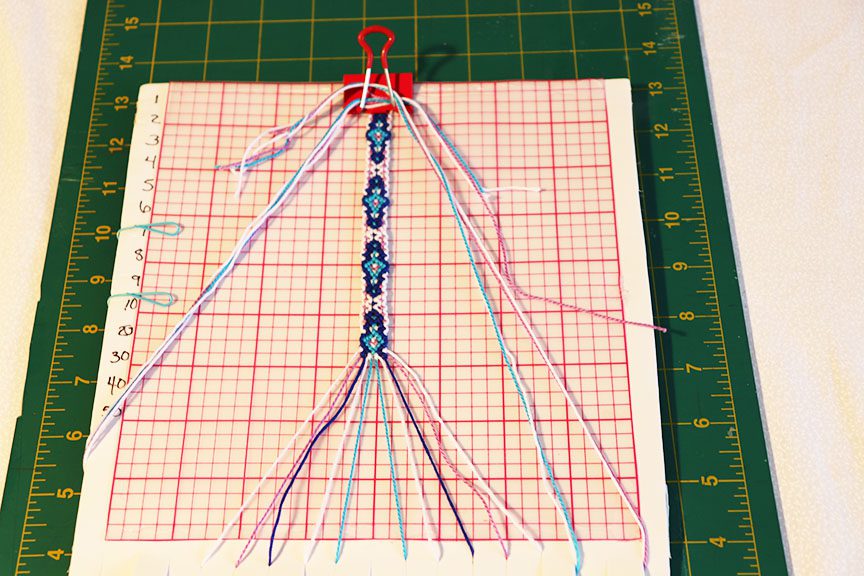
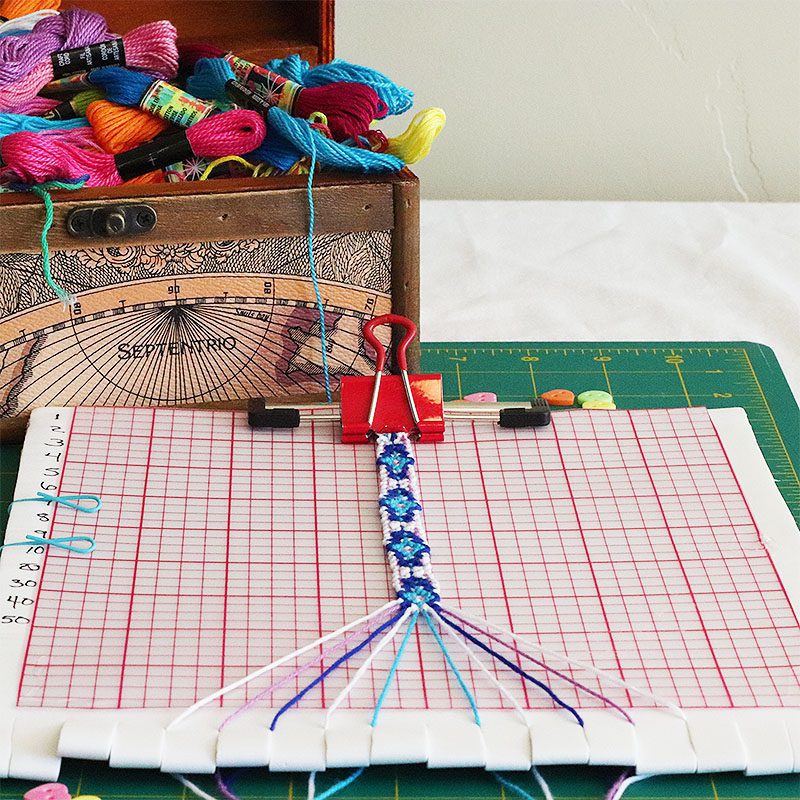
Oh! Here’s the Link to the bracelet pattern that is on the loom in the picture: #90529
Super Deluxe Option:
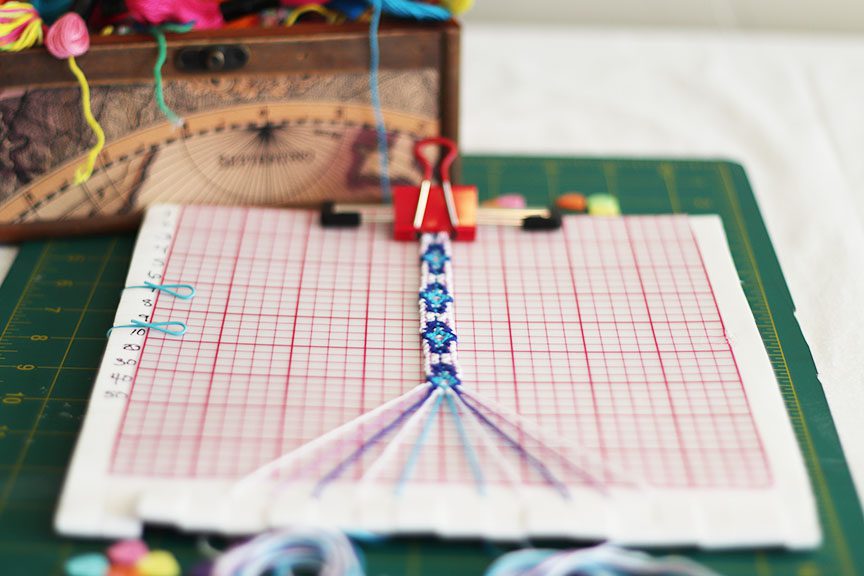
I happened to have a 6″ x 9″ clipboard and began using it with my Friendship Board Loom. A smooth, standard size clip board would no doubt work as well.
clipped the paper clamp around the board clamp to hold the threads in place. Using the clipboard gives me an extra place to smoothly tuck threads behind and out of the way while I am working. It’s not necessary, but it’s nice.
Thank you for this tutorial. I’m teaching my daughter how to make basic friendship bracelets and she keeps tangling and muddling up her threads. This seems like a very easy and inexpensive DIY solution.
You are so welcome. My granddaughters enjoyed learning how to make bracelets this way. Hope you and your daughter have a lot of fun with this craft.
Pingback: Making T-shirt Yarn ~ Creating & Baking Outside the Box