This content may contain affiliate links or sponsored elements, read our full ad Disclosure Policy.

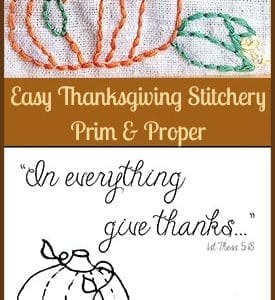
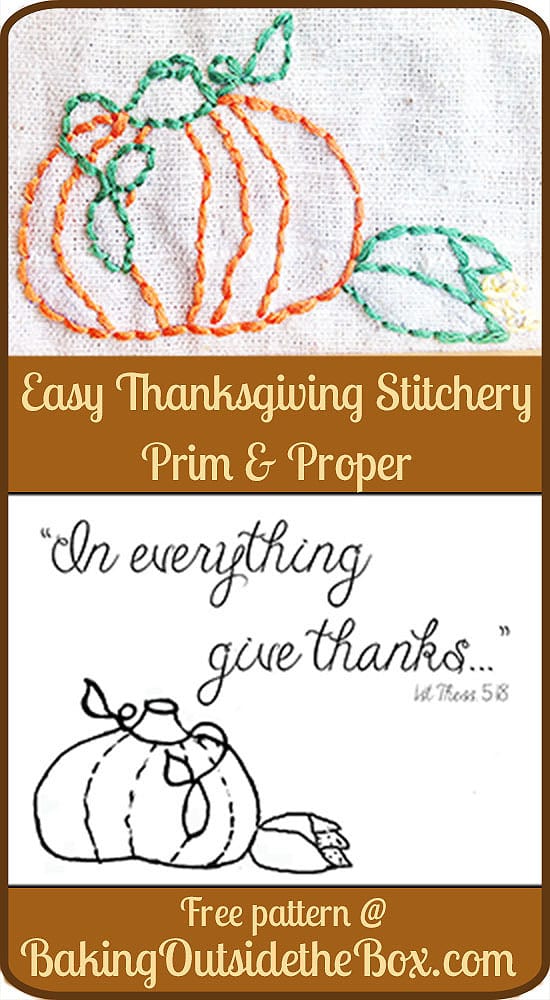
Here is a cute Thanksgiving Stitchery Pattern that is  quick to stitch up.

Get the pattern download I'm sharing for this cute Thanksgiving stitchery in two versions. So easy you'll whip up one for yourself and one for a friend. 1 Thessalonians 5:18

“In every thing give thanks: for this is the will of God in Christ Jesus concerning you.”

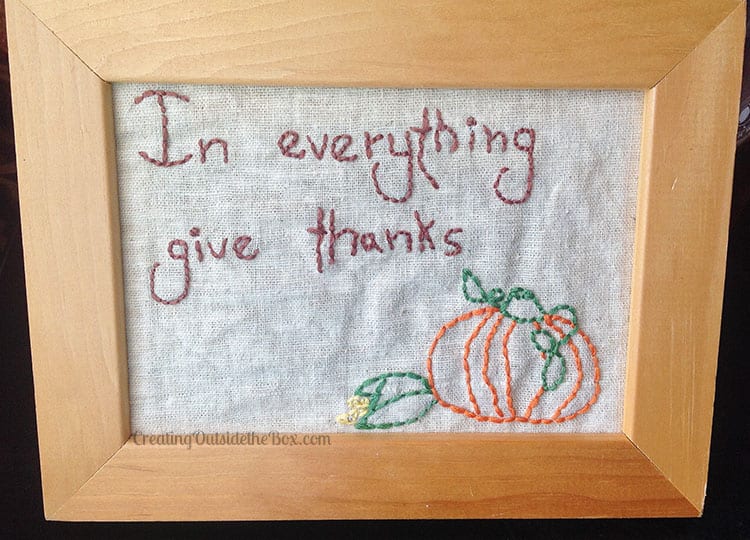
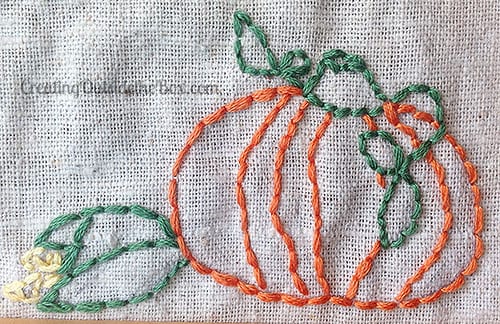
I created it a number of years ago.  I designed and made  it freehand as I wanted it to have a primitive (‘Prim’) look.  When I got it out this year, (yes I get out all the fall decorations at once 🙂 ), I thought about sharing it with all of you.  I found my rough pattern in digging through my files and I have re-created it in two versions for you to choose from:

givethanks_Laurasm

1. The original with my own lettering .

~OR~

give_thanks1sm

2. A more ‘proper’ version using a tidy handwriting font as well as the  attribution reference for the quote.

Either will fit into a 5″ h  x 7″ w frame as you can see from my original picture here.

primsampler

Download either pattern and view the instructions by clicking the links below.

Get the pattern download I'm sharing for this cute Thanksgiving stitchery in two versions. So easy you'll whip up one for yourself and one for a friend.

Download Primitive Thanksgiving Stitchery Pattern

Download Proper Thanksgiving Stitchery Pattern

Materials and Instructions for the Thanksgiving Stitchery:

Get the pattern download I'm sharing for this cute Thanksgiving stitchery in two versions. So easy you'll whip up one for yourself and one for a friend.

Materials:

1 off white  piece of rough muslin or cotton that is about 10″ x 10″ .

6-8″ embroidery hoop

embroidery needle

scissors

embroidery floss, orange, yellow, brown, green (you choose the shades)

masking tape

printer and paper

sharp pencil

daylight & window or a light table

1 frame for a 5 h “x 7 w” picture

a 5″ x 7″ piece of light cardboard or cardstock.

Instructions:

1. Print out the desired Thanksgiving stitchery pattern.

2. Tape it to a window that is receiving strong sunlight (or use your light table.) Tape cloth tautly over pattern (center it!).

3. Trace the stitchery pattern onto the cloth using the sharp pencil.  Remove everything from window.

4.  Place cloth in an embroidery hoop.

5.  Using three strands of floss, stitch using a simple outline stitch or back-stitch for the entire pattern, following the colors in the picture. Remove from hoop.  (See outline stitch video below.)

6. Iron the stitchery on the wrong side on medium setting and trim the piece to 9″w  x 7″ h.

7  Fold the edges evenly around the cardboard, centering, stitchery on the front and tape  or glue lightly into place.

8.  Place in the frame.  Enjoy!

Here is a short video for an outline stitch:

Leave A Comment

Your email address will not be published. Required fields are marked *