
DIY baker’s twine is something I’ve always wanted to try making. A while ago I saw the instructions of how to make baker’s twine by hand and so I gave it a try and while it was fun, it took FOR…EV…ER. I really, really wanted some Baker’s Twine, and there just had to be a faster way to produce it.
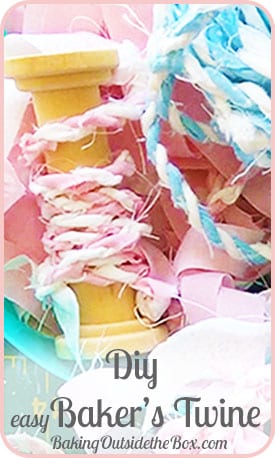
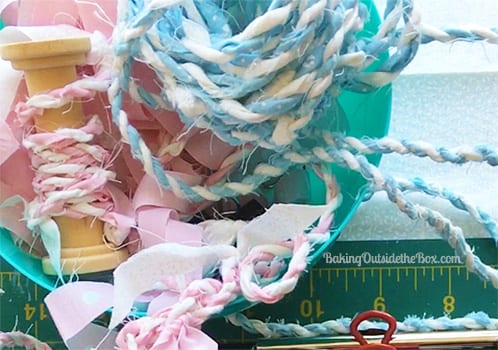
The twine pictured above, is made with cotton strips. They make a sturdy ‘Shabby Chic’ Baker’s Twine and can be used for making rag rugs, hairbands, weaving projects, macrame or in place of gift bows.
After a little experimenting, I’ve come up with a way to make it quickly. It’s fun to do and kids will enjoy it too.
I’ve made you all a short video tutorial because it’s so much easier and faster to show you, however the written instructions are below too.
To make Baker’s twine you will need the following:
-
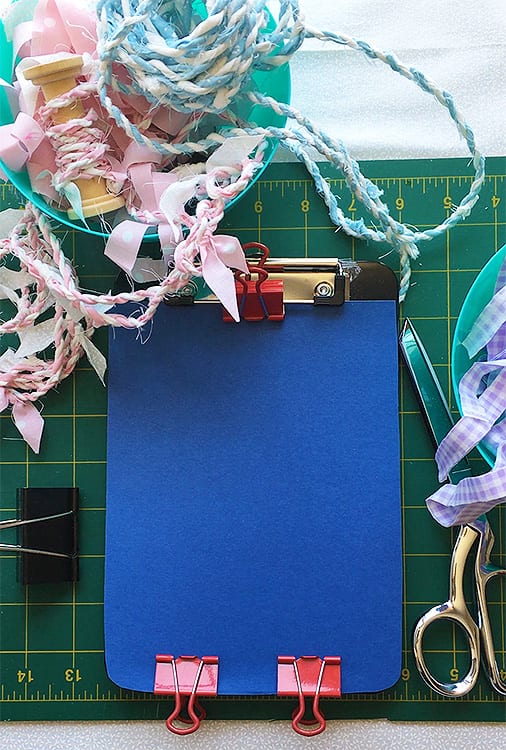
A clipboard (small or large will work)
-
3 medium binder clips
-
1 large binder clip
-
2- 1/4 yard pieces of cotton cloth (in different colors)
-
Scissors, ruler, pencil (or disappearing marker.)
DIY Baker’s Twine Instructions:
- Using the ruler and pencil mark the cloth at 1/2″ intervals and cut your cloth into 1/2″ wide strips*. You will get about 18 strips per quarter yard. If your cloth is 40 inches or more wide, you may wish to cut the strips in half (36) to make handing the pieces easier.
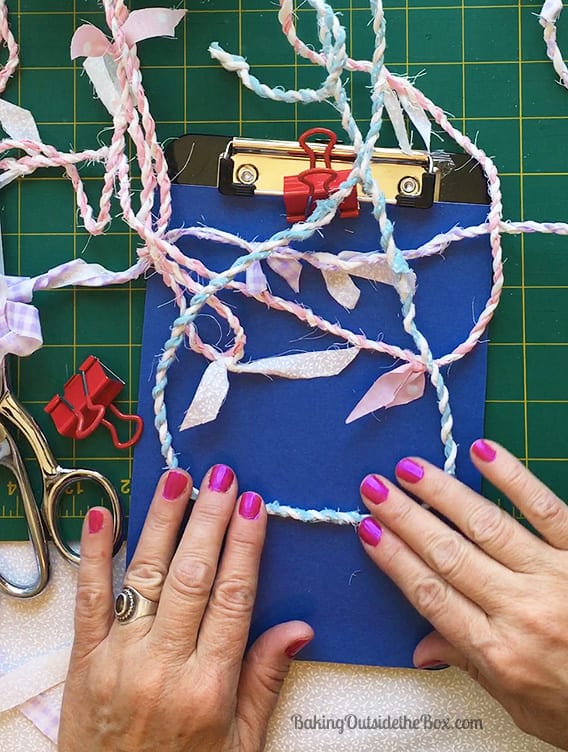
- Clip a medium binder clip to top of clipboard. (See picture.) This is so that the twine will be held firmly in place.
- Clip two medium binder clips to the bottom of the board.
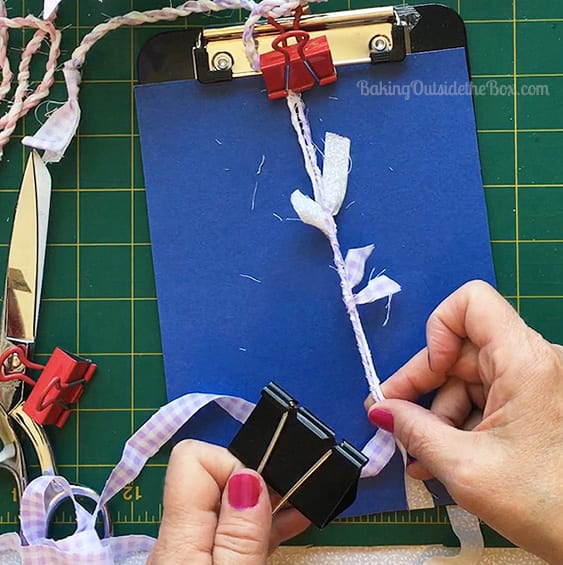
- Tie two strips (different colors) together and clip knot in top clip.
- Clip one of the cloth strips snugly at the bottom of the board.
- Clip the other strip with the large binder clip, so that clip is just past the bottom of the board. Tuck the tail of the cloth into the top of the large clip.
- Now put your forefinger through the top of one of the metal prongs and begin spinning the clip in counterclockwise turns around your finger. Smooth the twists in the cloth occasionally with your other hand. Continue spinning until the cloth is tightly wound and wind back on itself. Clip the wound cloth to the bottom of the board in medium clip.
- Repeat #7 with the second strip of cloth again using a counterclockwise motion. (The strips MUST be wound in the same direction for this to work!) Return it to clip at bottom of board.
- Carefully clip both the wound pieces of cloth into the large clip, evenly. Tuck the extra cloth tails in to the top of the large clip.
Here’s the Magic Step:
10. Here’s the magic step: Wind the two wound cloth strips CLOCKWISE together around each other, smoothly and tightly. The surprise here is that they naturally will do so if you have wound them in the opposite direction as described above.
11. Holding work at the bottom the wound pieces, un-clip and then re-clip work under top clip. When several inches of the Baker’s Twine is completed, begin again at #5.
12. To attach another piece of cloth as the strips are wound, all you do is simply use a square knot or a weaver’s knot to attach another strip of cloth. You can trim the ties or leave them on, as desired.
13. When you have made as much Baker’s Twine as you wish, tie a knot in the end of the work (as you would when threading a needle) this will keep the twine from unraveling. You will also need to make knots in both ends when ever you use it.
Please note: *You can make the cloth strips even wider — up to 1 inch wide to make a thicker twine. You can wind yarn or string too and also certain the first winding is in the same direction that it is spun.
Hey, Lefties like me: You may find it easier to twist the cloth strips clockwise and the two strips together, counterclockwise. 🙂
I hope you find making DIY Baker’s Twine as soothing and enjoyable as I did! — Laura
You may also enjoy:
thanks to these helps and inspirations: