This content may contain affiliate links or sponsored elements, read our full ad Disclosure Policy.
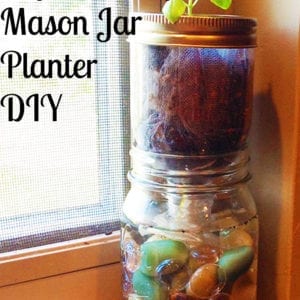
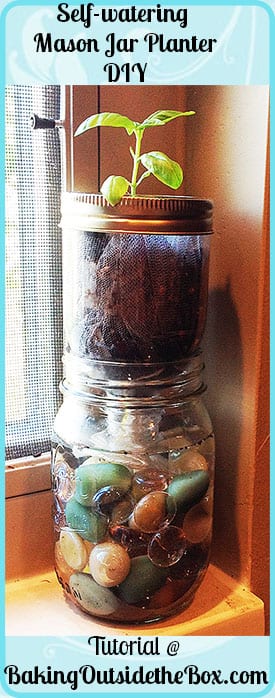
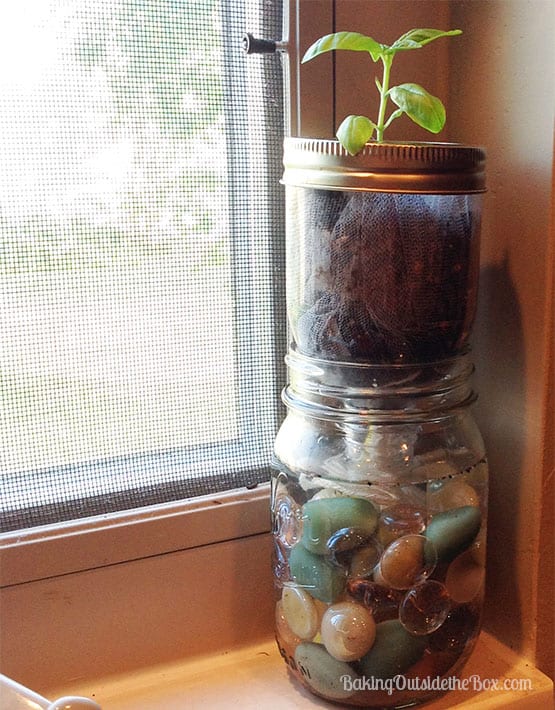
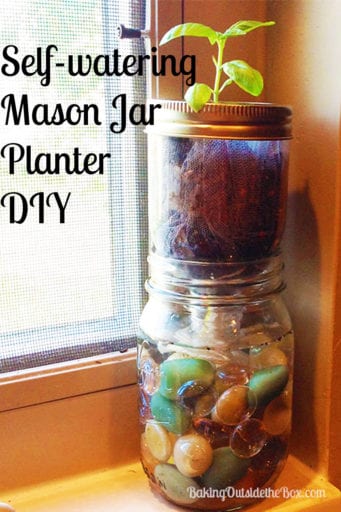 It was so fun to make this self-watering mason jar planter. It allows me to plant it and forget it.
A self-watering planter solves my problem of being able to leave on trips or simply forgetting a plant, and having the comforting thought that it will probably survive. As you might guess, I don’t usually keep plants indoors.
I’d seen pictures of different types of self-watering containers online. There are many sets of instructions for everything from a pop bottle to a shoe bag to a watering trough. I just wanted something that would sit on the windowsill in my kitchen, look pretty and not cost too much. So here is what I came up with:
Items to make the self-watering planter:
- A small plant or seeds. (Herbs and tiny succulents work the best.)
- pint-size canning jar and lid. (not wide mouth.)
- Smart water bottle and lid.. (You can skip the canning jar and use only the water bottle if you wish.)
- 8″ square or circle of nylon netting, paper towel or cheese cloth.
- A straw that is long enough to go the entire length of the planter and will fit into the lid of the water bottle snugly. (Optional)
- 2 yards of cotton string
- clean potting soil to fill planter top. (About a cup.)
- Decorative acrylic pebbles. (optional) Yes…I spent $3 dollars on these but strongly considered just washing off some colorful pebbles from my yard and using them. 🙂
It turned out that I had almost everything I needed in my kitchen to make this planter . One of my items was outside in the garden: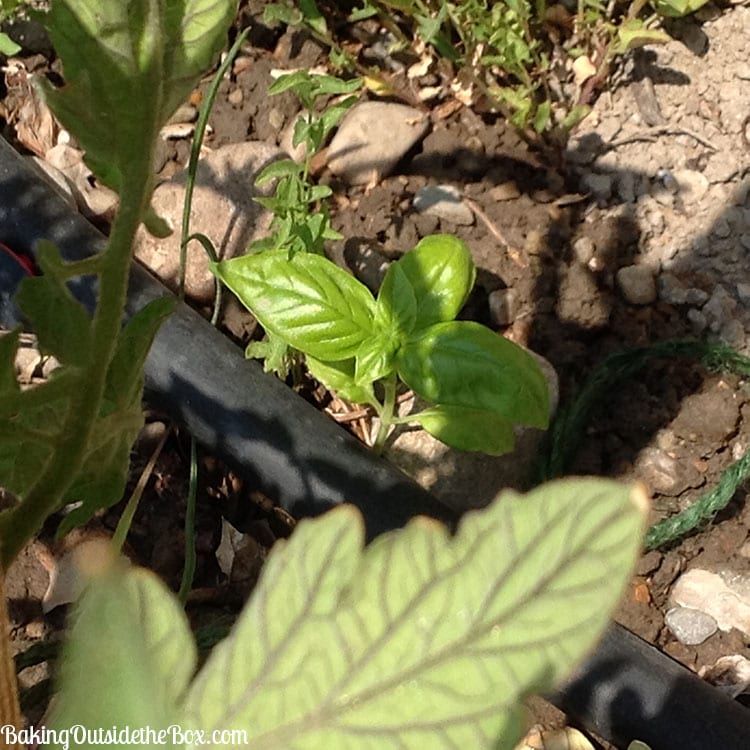
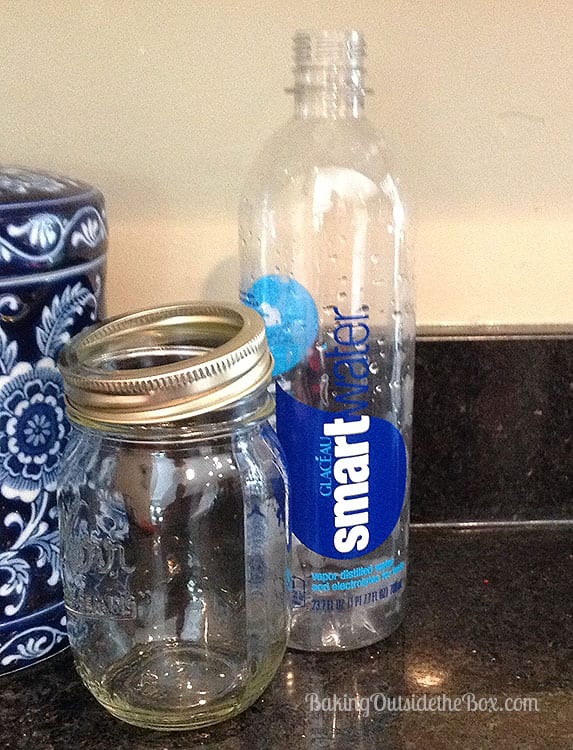
It was this cute little volunteer basil, proud and shy, standing under one of my tomato plants growing beneath my kitchen window. I found an unlikely, but fitting, pair of bottles; a pint size canning jar and a’ Smart’ water bottle. (I could have just used the bottom of the water bottle, but I wanted the cute and heavier pint jar as a base.)
Remove the label and cut the water bottle off 3- 4 inches from the bottom of the neck. Cut the cover on the lid off of the mouth piece. Set the mouth piece aside for later. Discard cover.
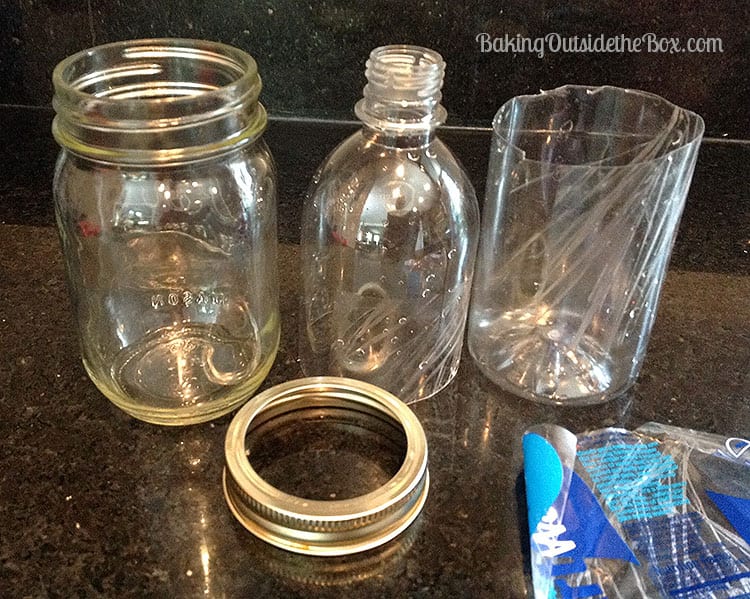
(I cleaned the sticky stuff off the top of the plastic bottle with ‘Goof off’ as well as olive oil and dish-soap.)
Flip the neck of the water bottle over so it rests in the top of the pint jar.
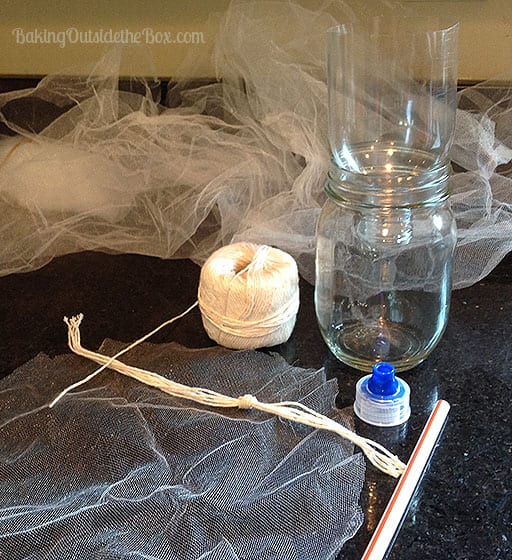
Cut 6, 12-inch strands of cotton string for the wicks. (You can also use strips of terry cloth. Some people use acrylic strips and one woman said she used the woven plastic tie off an onion bag and it worked! Weird huh? I played it safe with the cotton string.)
Knot the strings together, making a loose knot 3-4 inches from one end of the strings.
You will also need a piece of nylon netting (or a paper towel or cheese cloth) to line the plastic bottle so the soil is contained and won’t fall into the bottom. I made an 8 inch round and it was a bit too big, I ended up trimming it to fit.
Another method is to place a good sized square of window screen material in the bottom of the bottle. (You can only do this if you aren’t using the straw. Just trust me on this one.)
I folded the circle of netting in quarters and cut the tiniest whole in the center. (It wasn’t even an 1/8th of an inch across! Nylon netting can stretch a lot. You want the hole for the string to be small.
Thread the long half of the strings through the hole in the netting, keeping the shorter strings and the knot on top. This is the reason you want the hole to be tiny, you don’t want the knot to pop through the netting.
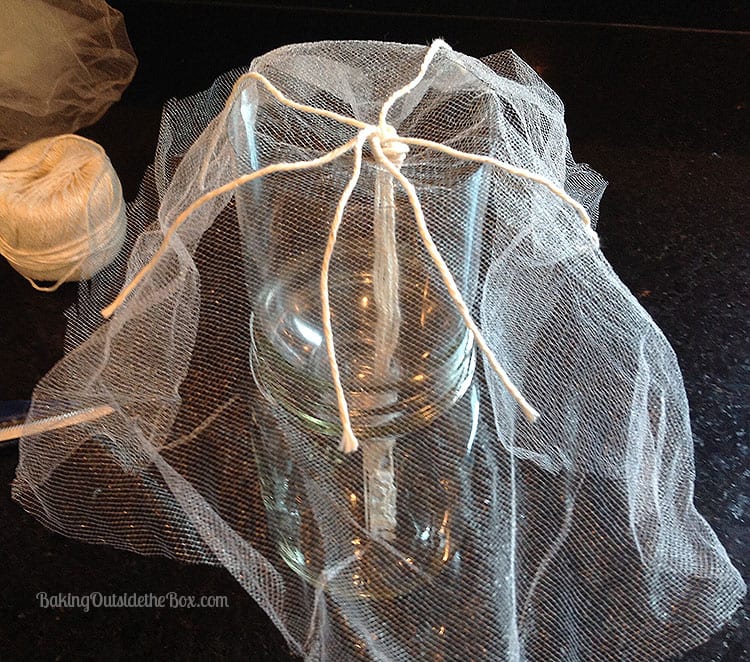
Place the netting and strings over the top of the planter as pictured. Thread the strings through the neck of the water bottle down into the mason jar.
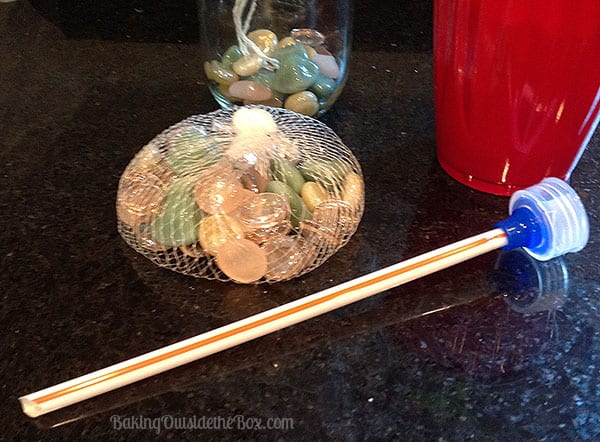
Place the mouth piece on the end of the straw. (I had to squeeze my straw a bit to make it fit into the mouth piece. It should fit snugly.) This will be the watering tube. It is optional. You could remove the top of the planter and pour water into the base instead, if you wish.
Test the straw length by inserting it outside the netting and through the water bottle neck into the base of the planter. it should come up to just below the rim at the top of the planter. Trim length if needed. Cut bottom of straw at a slight angle and replace it outside of netting and into the base of the planter.
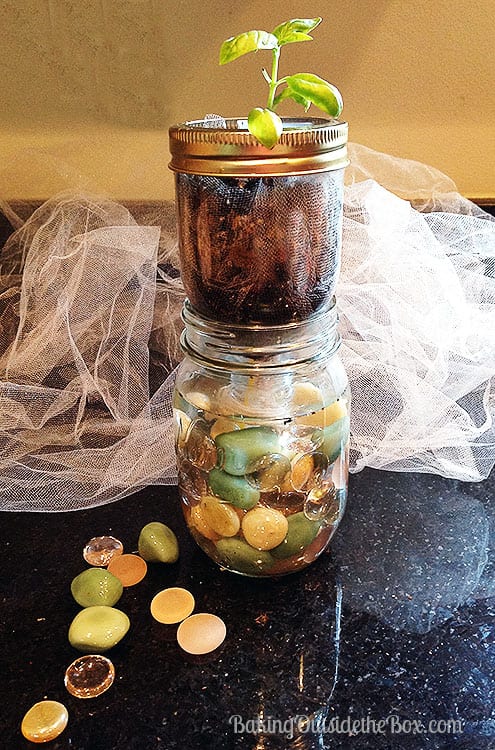
Pour decorative pebbles into base of jar, if using.
Spoon potting soil into netting gently, allowing for the volume of the plant and the soil with it, keeping wicking strings going up the sides. Fill it up to with in 1/2 inch of the rim. (If planting seeds, fill with dirt and then plant.)
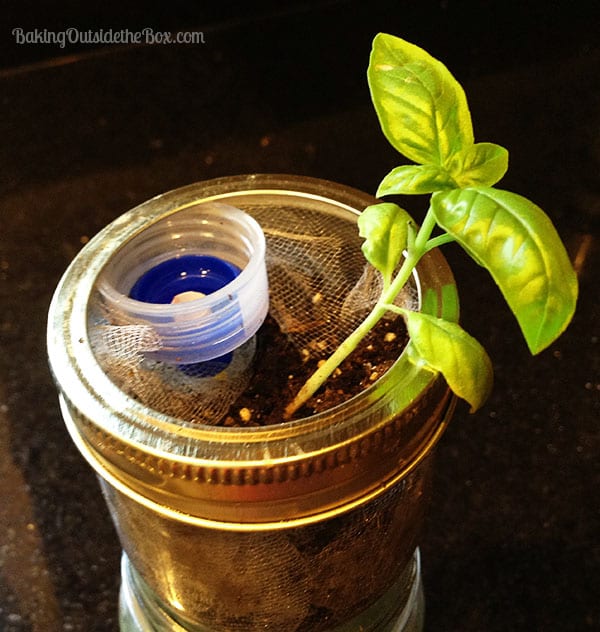
Trim liner and wicks, if needed, to below the rim of the planter.
Place the lid of the pint jar onto the rim of planter. (I had to coax mine a bit.)
That’s it! Enjoy your new self-watering planter.
Pingback: Transplanting Basil Indoors ~ Creating & Baking Outside the Box
Pingback: 22 DIY Self Watering Planter Ideas: A Guide to Easy and Efficient Plant Care