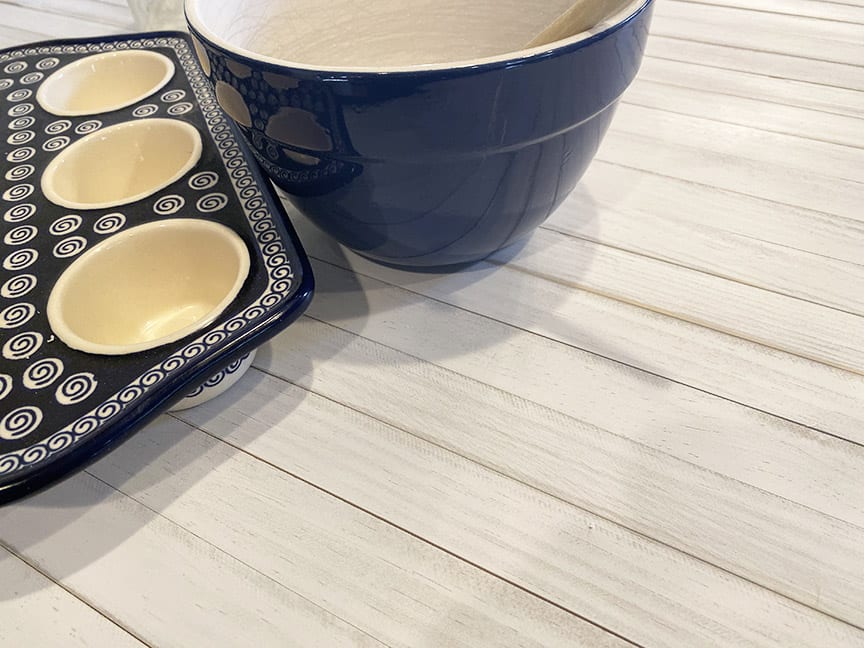
Flat Lay Photo Backdrop DIY
A Flat Lay Photo Backdrop DIY can come in a wide variety of styles and materials. There are many, many vinyl backdrops, as well as cloth, wood and metal. Lastly of course is whatever one’s kitchen counters are made of. With the occasional white table cloth, my counter top is what I’ve been using for taking my flat lay photos for the last 9 years on this blog.
I have very nice, very shiny black granite counters. Basically that’s been two strikes against me as far as a background for food photography, ie; shiny and black. You can only imagine that I’ve been dodging the lights in my kitchen and trying to make the colors pop on the things I’m snapping pictures of for a long time! (Funny enough, dark backdrops are considered quite chic at the moment!)
I’ve wanted a large wooden backdrop for eons. You know, one of those wooden platforms with lightly distressed / weathered wood. I considered vinyl and even though it’s more reasonably priced than wood, it did not appeal to me. In my research I discovered that buying a good-size wooden backdrop can be a pricey proposition.
Very Important: Read through all the instructions before beginning the project.
My Wish List for a Wood Flat Lay Photo Backdrop DIY
I decided to wander the aisles of the hardware store pricing wood. I had a wish list:
- The finished product is easy to store.
- It’s reasonably lightweight
- Make the project myself.
- It should be matte, almost white, lightly distressed but never distract from the subjects of my photos.
- Two pieces – so that if I only needed a small space for photo-taking, I won’t have to drag the whole thing out.
- A large-ish tabletop platform for large projects, when needed.
- I like unique. Handmade will be different than all the other backdrops out there. It would be my creation and part of my branding.
How I Came Up with a DIY Solution:
I wanted to look at what my wood options were and price them out. What I found was that all of the wood including the cheapest, rough particle board would be outside my self-imposed goal of keeping everything under $50 dollars. In addition all the wood was very heavy and I just wasn’t willing to buy it.
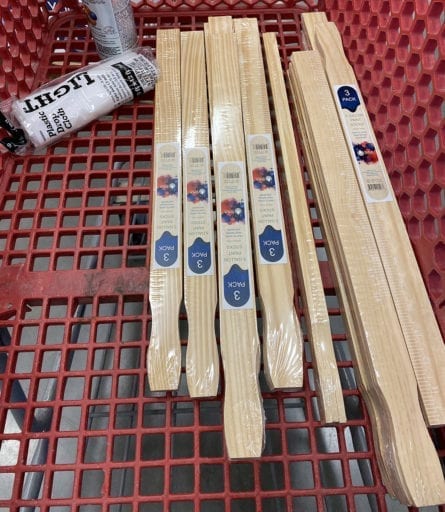
What to do? I was on my way back to the front of the store to drop off my cart when I spied paint stir sticks. The long 5 gallon size caught my eye. They had a ruler on one side and I thought the plain wood grain on the other side was quite nice. They were .98 cents a 3 pack.
A light bulb went off in my head. Why not adhere them to foam core boards? The foam core boards at the Dollar Store were perfect and well — a dollar each.
How I made the Photo Backdrop
After buying measuring the foam core boards, I went back to the hardware store and picked up 14 packages of the 5 gallon stir sticks (3 to a pack) . It takes 21 sticks on a side to cover each of the boards. I also picked up 3 cans of spray chalk paint and some strong spray adhesive. With the drop cloth the total was $47.00. Yippee!
Items List
- 2 – foam core boards (20″ x 30″)
- 42- 5 gallon stir sticks (21″ long)
- Rust-Oleum chalked spray paint :
- White Linen,
- Aged Grey,
- Matte Clear Spray Paint
- Gorilla Spray Adhesive
- masking tape 1″ wide
- fine sand paper
- plastic drop cloth
- pencil
- medium-sized cardboard box to use the spray adhesive in and old newspaper.
Lay out:
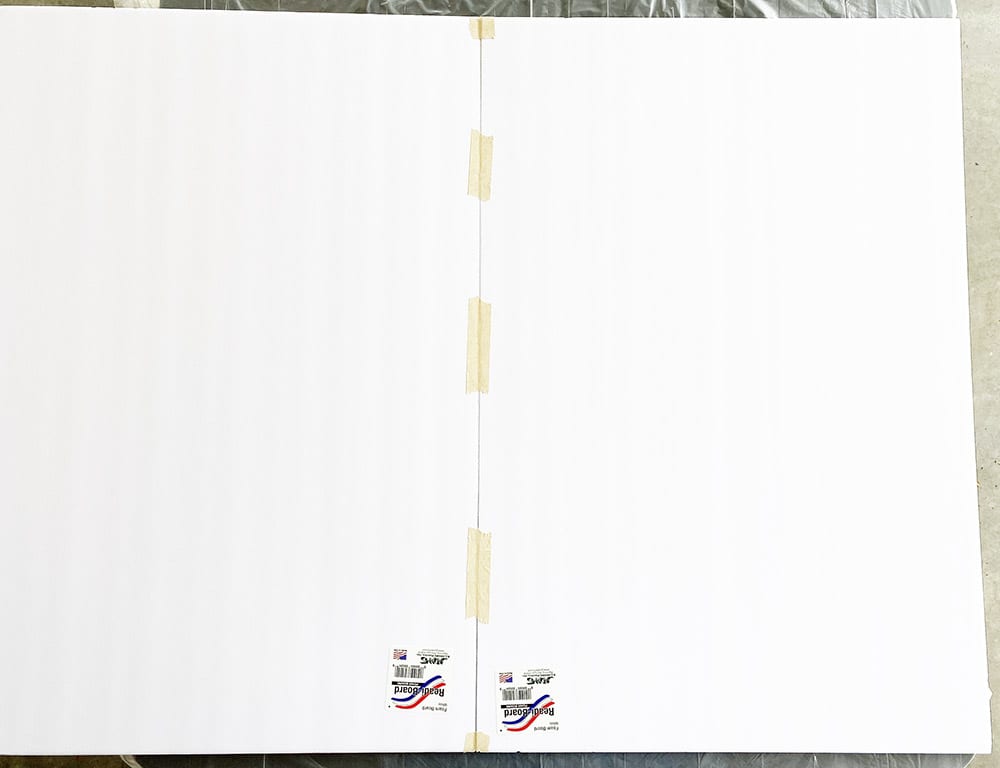
1. Place the drop cloth on your work surface. Tape the two boards together with masking tape at the center. (To be removed later.)
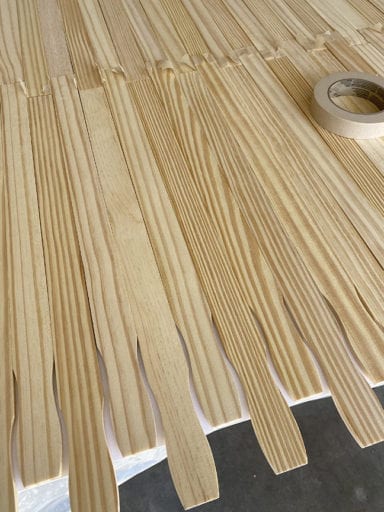
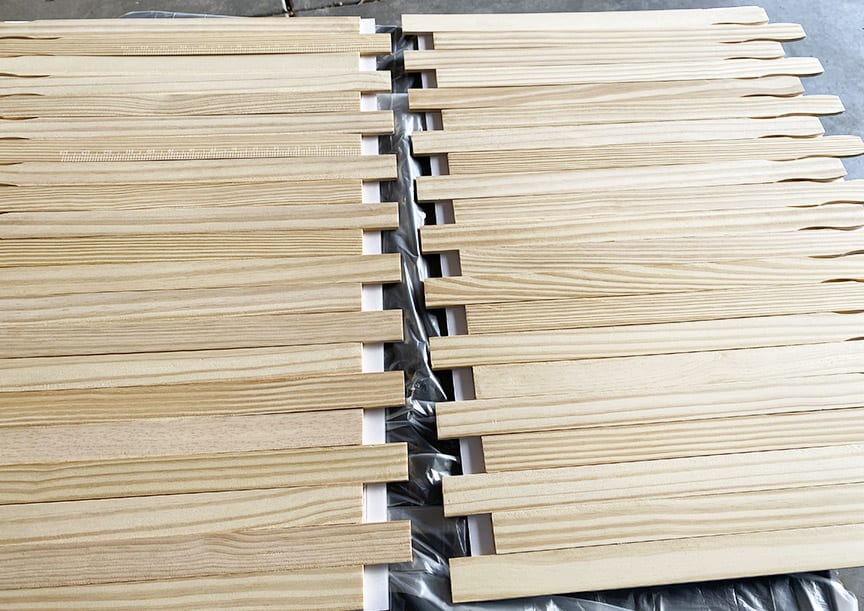
2. Lay out the sticks alternating so that every other one is 1 inch from the center line and the next one is one inch over the center line. Mark with a pencil on the board where the sticks are 1 inch from the center line. as you can see, the sticks alternate on each side. (See picture.)
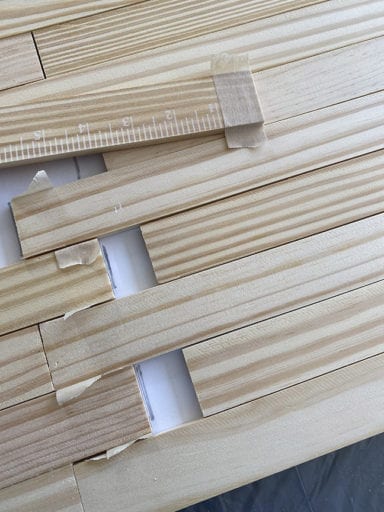
2 continued: All of the sticks that cross the center line must be covered with 1″ masking tape at the edge that crosses over. (Note the tape in the picture above.) You’ll also note that I turned the ruler side of the sticks face down. (The only time I used one face up was to insure a good fit because the stick was slightly warped.)
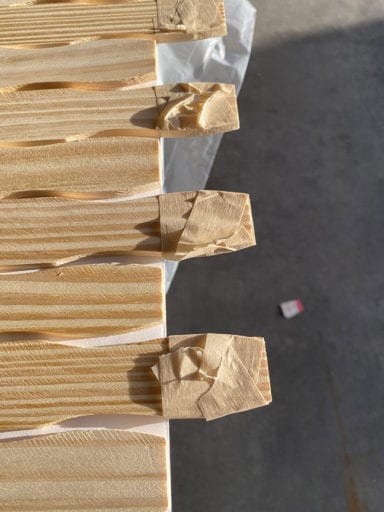
(Please Note): As you can see, the sticks that are over the center line, are even with the outside edge of the board. The ones that are away from the center line, have the handle overhanging the outside edge of the board.
3. When finished with step 2, slide all the pieces together to insure a perfect fit. Then proceed to wrap the outside handles that hang over the edge with masking tape from the edge of the board to the tip of the handle.
Please note: Covering the alternating edges of the sticks is crucial for the adhesive step and so the pieces will interlock and unlock with ease. (In other words, you don’t want a sticky mess.)
Gluing the sticks down to the boards:
4. Adhering the sticks to the marked board: After the sticks are laid out and taped, you spray them one at a time, placing them as you have previously marked them, alternating sides. (Remove the masking tape (after spraying) from the inside edges of the sticks and from the center of the foam core boards as you proceed.)
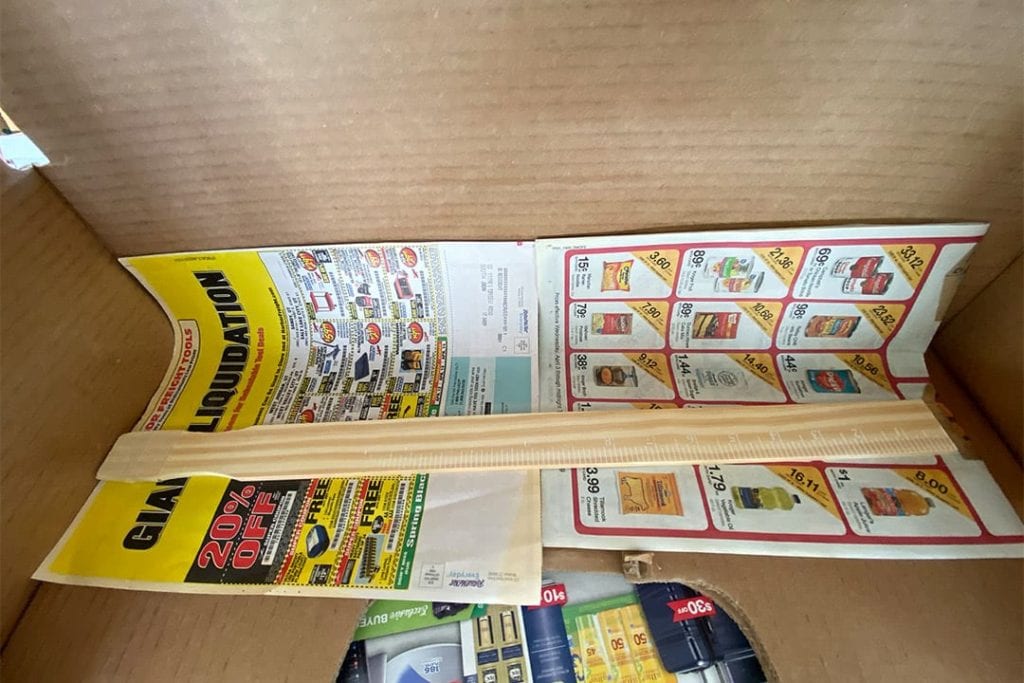
The easiest way to spray the adhesive on each stick is to use an old cardboard box that is long enough to lay the stick face down in and then spray it as directed. When the box becomes sticky, lay some old newspaper over the sticky area and keep working. Area should be well ventilated.
Important tip: the tack time on the Gorilla glue is fast. But you will have a chance to readjust the stick as you lay it down.
Before You Spray Paint
5. After the paint sticks have been glued down to the Foam core board, Gently slide the two pieces apart. Leave them side by side. keeping them next to each other will help keep the paint coverage even between the two pieces.
Remove the tape from the handles. Check all pieces to be certain all masking tape has been removed from the project.
Time to Paint
6. The colors I used are in the list above if you wish to use them. However, this is your project. Go with what will make you happy.
This is how I got a lightly distressed finish:
Start with the ‘Aged Grey’. Using according to the product instructions, spray with a sweeping motion across both boards. Give good coverage to the sticks as well as whatever parts of the board is showing between the handles.
Allow about an hour of drying time before over-spraying with the ‘White Linen’ paint. Repeat the sweeping side to side motion while spraying.
Allow to fully dry, about 24 hours.
Sand it
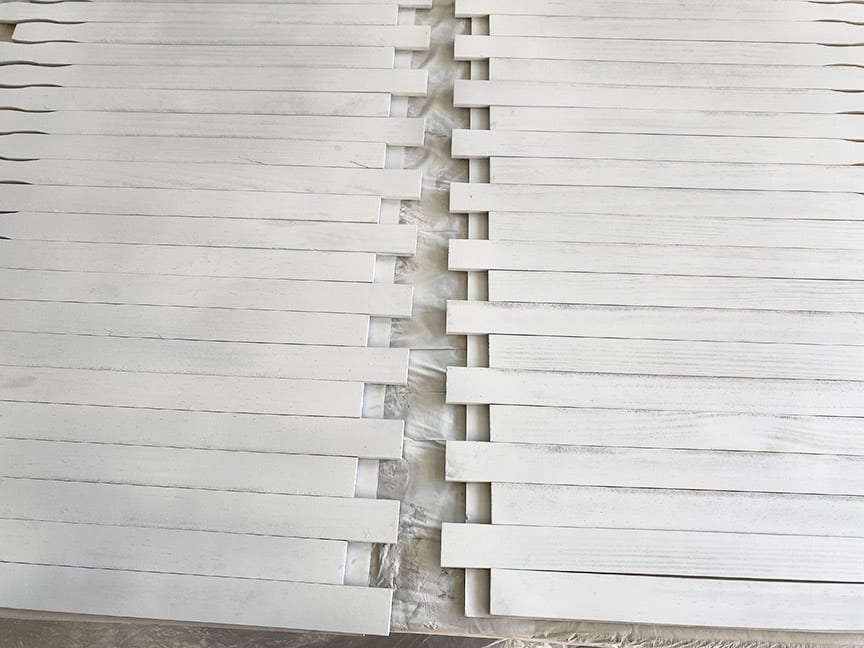
7. Using the sand paper, lightly sand in various places across the board so that some of the grey shows through. This step is variable.
In the picture above you can see how my distressing turned out. I loved how some of the wood grain peered through the paint.
You can have a lot of grey exposed or just a little. It’s up to you.
Wipe the sanded boards off with a clean cloth and/or brush the grit off with a clean, dry paint brush.

Seal it
8. Seal the boards with the spray matte finish and allow to dry completely. Backdrop complete.
The easiest way to slide the boards together and take them apart is surprisingly on their edges:
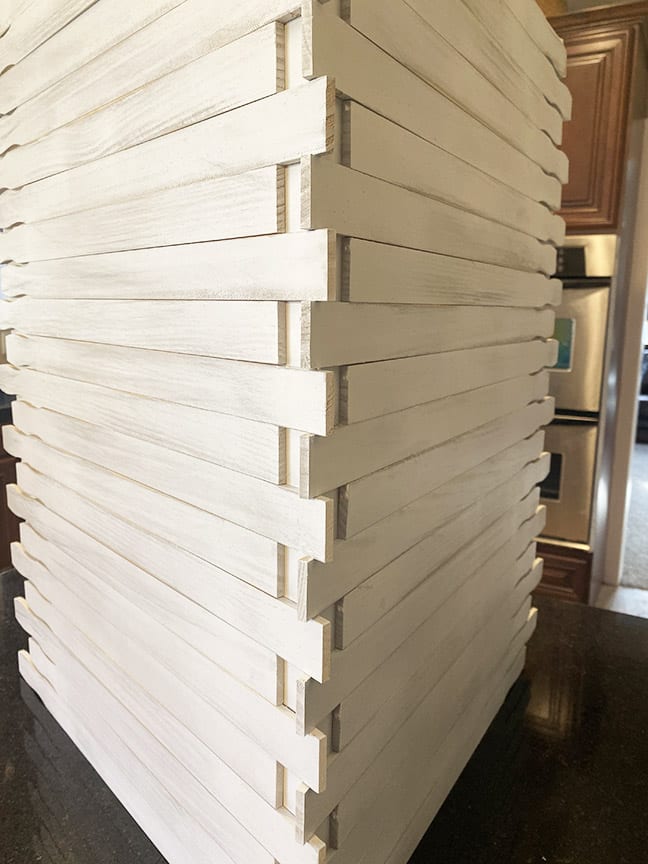
Putting the Flat Lay Photo Backdrop DIY together
It makes it easier to interlace the center boards and avoid bumping into the foam core center edges.
This also works in reverse to take the boards apart for use on just half the back drop or storage.
I hope this will inspire you to try making your own flat lay backdrop. Enjoy! -Laura